Roofing
What is a Square in Roofing? The Basics of Roofing Measurements
Nov
What is a Square in Roofing? When it comes to roofing projects, accurate measurements are essential. Roofing contractors often use a unit of measurement called a “roofing square” to estimate the materials needed for a project.
Understanding what a roofing square is and how it influences your roofing project is crucial for homeowners.
In this article, we will delve into the fundamentals of roofing squares, factors affecting estimates, the relationship between shingles and bundles, and how visualization tools can aid in the decision-making process.
What Is a Roofing Square?
Roofing projects can be intricate undertakings, requiring precise calculations to ensure the right materials are used, and costs are accurately estimated.
At the heart of these calculations lies the concept of a “roofing square.” But what exactly is a roofing square, and why is it crucial to understand for any roofing project?
Let’s delve deep into this foundational aspect of roofing measurements.
The Definition of a Roofing Square:
A roofing square is a standardized unit of measurement used in the roofing industry, representing 100 square feet of roof area.
This unit serves as a practical way to simplify complex roof measurements, making it easier for contractors to estimate the materials required for a project.
By breaking down a roof’s vast expanse into manageable squares, contractors can precisely determine the amount of roofing material needed, ensuring efficiency and accuracy in their work.
Conversion of Roofing Measurements into Squares:
Roofing measurements often involve a myriad of angles, slopes, and architectural intricacies. Converting these diverse measurements into roofing squares provides a universal language for contractors.
To calculate roofing squares, the total roof area is divided by 100.
For instance, if your roof measures 2,300 square feet,
it translates to 23 roofing squares (2300 sq. ft. ÷ 100 = 23 squares).
This conversion simplifies the estimation process, enabling contractors to assess material requirements with ease and precision.
How Contractors Use Roofing Squares for Estimation:
Roofing squares serve as the foundation upon which accurate estimates are built. Contractors utilize this measurement to assess the quantity of roofing materials needed, including shingles, underlayment, and other essential components
By knowing the number of roofing squares, contractors can determine the appropriate number of shingle bundles required for the project, ensuring that they neither over-purchase, leading to unnecessary expenses, nor under-order, risking project delays.
Understanding roofing squares empowers contractors to create detailed and reliable project proposals for homeowners.
It also facilitates transparent communication between contractors and clients, ensuring that both parties are on the same page regarding the scope of the roofing project.
In summary, a roofing square is not merely a unit of measurement; it is the cornerstone of every roofing project.
By comprehending the intricacies of roofing squares, homeowners and contractors alike can embark on roofing projects with confidence, knowing that accurate material estimates are the first step toward a successful and cost-effective endeavor.
Factors Influencing Roofing Estimates
Roofing estimates are more than just calculations; they are intricate assessments that take into account various factors to ensure precision and accuracy.
These factors can significantly influence the estimation process, requiring careful consideration and expertise.
Let’s explore the complexities involved in roofing estimates and understand how these elements impact the overall project planning.

Architectural Details and Their Impact:
No two roofs are exactly alike, especially when it comes to architectural details. Features such as rakes, valleys, and eaves add character to a home but also complicate the roofing process.
These details create additional starting and stopping points for the installation, making accurate measurements and material estimation crucial.
Roofing squares, while providing a standardized measurement, must be adjusted to accommodate these architectural intricacies.
Experienced contractors possess the knowledge to factor in these details, ensuring that every unique element of the roof is considered in the estimation process.
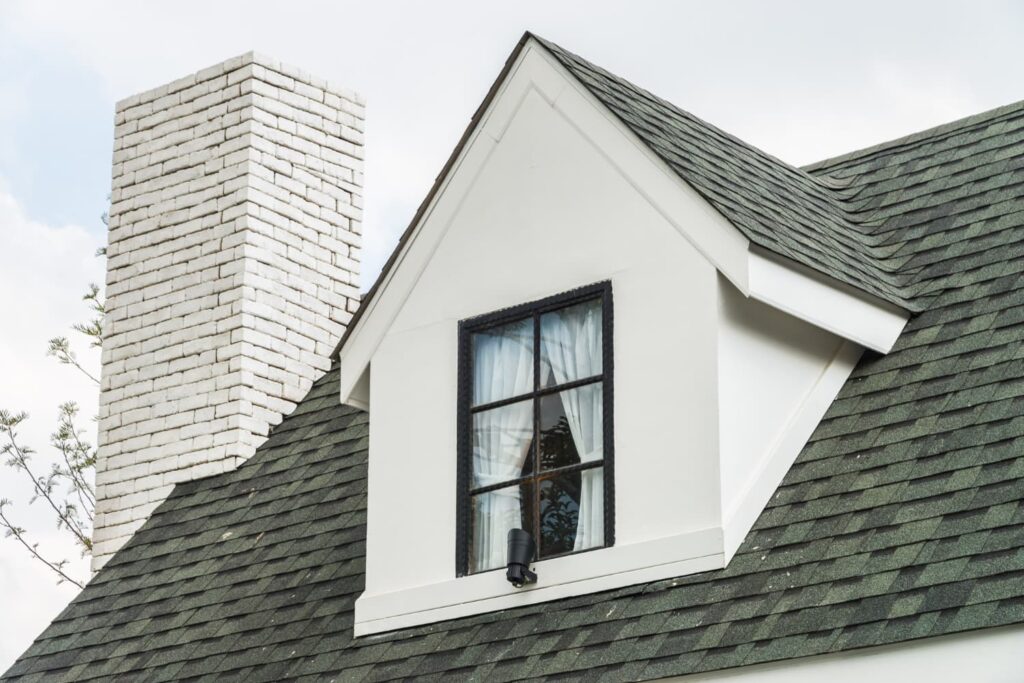
Consideration of Overhangs and Dormers:
Overhangs and dormers enhance the aesthetic appeal of a house, but they also pose challenges during roofing projects.
These features create irregular roof shapes, leading to increased material waste during installation. Contractors must carefully assess the impact of overhangs and dormers on material requirements.
Waste factors are incorporated into the estimation to account for these irregularities, preventing unnecessary expenses and ensuring that the project stays within budget.
Waste Factors and Adjustments:
Roofing projects generate waste, whether due to cutting shingles to fit specific angles or accounting for damaged or imperfect pieces.
Contractors apply waste factors to the calculated roofing squares to accommodate this inevitable waste.
Additionally, adjustments are made based on the complexity and pitch of the roof. Steeper roofs require more materials due to their incline, making accurate estimation paramount.
Contractors with a keen understanding of these factors can fine-tune their estimates, ensuring that the right amount of materials is ordered to complete the project without shortages or excess.
By carefully analyzing these factors, contractors can provide homeowners with precise and reliable estimates.
Clear communication between homeowners and contractors regarding the roof’s architectural details, overhangs, and other complexities is essential.
It allows homeowners to gain insights into the estimation process and ensures that the final proposal comprehensively addresses all aspects of the roofing project.
Shingles and Bundles
Roofing materials are at the heart of any roofing project, and understanding how these materials are packaged and used is essential for homeowners and contractors alike.
Shingles, the primary material used for residential roofing, are packaged in bundles. Delving into the intricacies of shingles and bundles provides valuable insights into the selection and estimation process for roofing projects.
How Shingles Are Bundled for Sale:
Shingles, whether made of asphalt, wood, metal, or other materials, are bundled for sale in packages. These bundles are designed to be lifted and moved around the roof with ease, ensuring convenience during installation.
Each bundle contains a specific quantity of shingles, carefully packaged to prevent damage during transportation and storage.
Understanding how shingles are bundled is the first step in accurately estimating the materials required for a roofing project.
Determining the Number of Shingles in a Bundle:
The number of shingles in a bundle varies depending on the type and brand of shingles chosen.
For example, popular asphalt shingles like GAF Timberline® HDZ™ typically require about three bundles to cover one roofing square.
It is crucial for homeowners and contractors to be aware of the specific shingle specifications to calculate the number of bundles needed accurately.
This knowledge ensures that the right amount of material is ordered, preventing shortages or excess that can disrupt the project timeline and budget.
Explanation of Different Roofing Materials and Their Bundle Specifications:
Different roofing materials come with unique characteristics and bundle specifications. Wood shingles, for instance, might have different dimensions and packaging requirements compared to metal or slate shingles.
Homeowners need to consult with roofing professionals or manufacturers to understand the bundle specifications for their chosen roofing material fully.
This understanding allows for informed decision-making, ensuring that the selected material aligns with the project requirements and budget constraints.
By delving into the details of shingles and bundles, homeowners and contractors can make informed choices during the material selection and estimation process.
Contractors, armed with knowledge about the number of shingles in each bundle, can accurately calculate the total quantity of materials needed for the project.
Homeowners, on the other hand, can confidently discuss their preferences with contractors, knowing the specifics of the chosen roofing material and its packaging requirements.
In summary, the world of roofing materials is diverse and nuanced. Understanding how shingles are bundled, the quantity in each bundle, and the specifications of different roofing materials empowers both homeowners and contractors.
Armed with this knowledge, they can collaborate effectively, ensuring that the roofing project proceeds seamlessly, resulting in a durable, functional, and visually appealing roof that stands the test of time.
Calculating Shingles Needed for a Project
Calculating the exact number of shingles needed for a roofing project is a critical step in the planning process.
It requires careful consideration of the roof’s dimensions, architectural intricacies, and the type of shingles selected.
Let’s delve deep into the meticulous process of determining the shingles required, ensuring precision and efficiency in material estimation.
Calculation Process Using Roofing Squares and Bundles:
- Determine Roofing Squares: The first step is to measure the roof’s total area in square feet and convert it into roofing squares. Remember, one roofing square equals 100 square feet. This measurement provides a standardized basis for the calculation process.
- Consider Architectural Details: Account for any architectural details such as rakes, valleys, eaves, overhangs, and dormers. These features influence the starting and stopping points for shingle installation, requiring additional shingles. Experienced contractors factor in these details, adjusting the total number of squares accordingly.
- Incorporate Waste Factors: Waste factors are crucial to accommodate material wastage during installation. Whether it’s due to cutting shingles to fit specific angles or accounting for damaged pieces, waste factors prevent shortages. These factors are typically expressed as a percentage of the total material needed, ensuring a buffer for unexpected situations.
- Calculate the Number of Bundles: Once the adjusted number of roofing squares is determined, calculate the number of shingle bundles required. Each type of shingle has specific packaging, with a set number of shingles per bundle. Divide the total number of squares by the shingles per bundle to find the exact quantity of bundles needed for the project.
Example Calculations for a Typical Roofing Project:
Let’s consider a hypothetical example to illustrate the calculation process:
- Roof Area: 2,500 square feet
- Architectural Details: Additional 10% for rakes, valleys, and overhangs
- Waste Factor: 15% to accommodate cutting and damaged shingles
- Shingles per Bundle: 30 shingles per bundle (for GAF Timberline® HDZ™)
- Calculate Roofing Squares: Total Roof Area = 2,500 sq. ft. Total Roofing Squares = 2,500 sq. ft. ÷ 100 = 25 squares
- Adjust for Architectural Details: Additional Squares = 25 squares + (10% of 25 squares) = 27.5 squares
- Incorporate Waste Factors: Waste Factor = 15% of 27.5 squares = 4.125 squares Total Squares with Waste = 27.5 squares + 4.125 squares = 31.625 squares
- Calculate Bundles Needed: Shingles per Bundle = 30 shingles Bundles Needed = 31.625 squares × 100 sq. ft. ÷ 30 shingles per bundle ≈ 105.42 bundles
In this example, approximately 106 bundles of shingles would be required for the roofing project, considering the roof’s area, architectural details, and waste factors.
By following this meticulous calculation process. Homeowners and contractors can ensure that the right quantity of shingles is ordered, preventing shortages and excessive expenses.
Accurate material estimation paves the way for a seamless roofing project, where resources are utilized efficiently, and the final result is both durable and visually appealing.

Visualizing Your Roofing Project
Choosing the ideal roofing material is not solely about technical specifications; it’s also about envisioning how the final result will enhance your home’s appearance and functionality.
Visualization tools play a pivotal role in helping homeowners make confident decisions.
Let’s explore the significance of visualizing your roofing project and how advanced tools can transform the decision-making process.
Importance of Choosing the Right Shingle for Aesthetic Appeal:
Roofing is not just about protection from the elements. It significantly contributes to a home’s curb appeal.
The right shingle can enhance the architectural style, complement the color scheme, and elevate the overall aesthetics of your home.
Therefore, selecting a shingle that resonates with your taste and harmonizes with your home’s design is crucial.
Visualization tools allow you to experiment with various shingle colors, styles, and textures, enabling you to find the perfect match for your home.
Introduction to GAF’s Virtual Remodeling Tool:
GAF, a leading roofing manufacturer, understands the importance of making informed decisions about your roofing project.
To simplify the selection process, GAF offers a cutting-edge virtual remodeling tool. This tool allows homeowners to visualize different shingle colors and styles on their homes in a realistic digital format.
Whether you’re considering traditional asphalt shingles, architectural shingles, or specialty options, the tool provides an immersive experience.
How the Tool Helps Homeowners Visualize Different Shingle Options:
- Selecting Your Home: Begin by choosing a preloaded model home similar to yours or upload a photo of your own home to the tool. This sets the stage for a personalized visualization experience.
- Trying Different Shingle Colors: Experiment with an extensive palette of shingle colors. From classic neutrals to bold hues, the tool lets you see how each color will look on your roof. Visualize how natural light impacts the appearance and choose a color that complements your exterior.
- Exploring Shingle Styles: Beyond colors, the tool allows you to explore various shingle styles, including architectural designs and specialty patterns. See how different styles add depth and character to your roof, enhancing its visual appeal.
- Coordinating with Siding and Doors: To complete the look, the tool enables you to change the color of your home’s siding and doors. This holistic approach lets you evaluate the overall color scheme, ensuring a harmonious blend between the roof, siding, and other exterior elements.
Choose with Confidence:
By utilizing GAF’s virtual remodeling tool, homeowners can make decisions with confidence.
Visualizing your roofing project before it begins provides peace of mind, ensuring that the chosen shingle color and style align perfectly with your vision.
It eliminates the guesswork, allowing you to see the outcome before making a commitment.
Conclusion
Understanding the concept of a roofing square is fundamental to any roofing project. By considering factors such as architectural details, roof complexity, and pitch, homeowners can ensure accurate estimates and efficient use of materials.
Additionally, utilizing tools like GAF’s virtual remodeling tool empowers homeowners to make confident decisions about their roofing projects.
With this knowledge, homeowners can embark on their roofing projects with confidence, knowing they have
Frequently Asked Questions(FAQ’s)
Q1: What does square mean in roofing?
A1: A “square” in roofing is a unit of measurement equal to 100 square feet of roof area, simplifying material estimation for projects.
Q2: How much is 1 square on a roof?
A2: One square on a roof equals 100 square feet of area, providing a standardized measurement for roofing projects.
Q3: How big is a square?
A3: A square in roofing represents 100 square feet, serving as a convenient unit for estimating materials.
Q4: How many roof tiles in a square?
A4: The number of roof tiles in a square varies based on size and type; it is calculated by dividing the tile’s size into 100 square feet.
Q5: What is 20 square in roofing?
A5: “20 square” in roofing refers to 2,000 square feet of roof area, aiding in material and cost estimation for larger projects.
Q6: What is 22 squares in roofing?
A6: “22 squares” in roofing represent 2,200 square feet of roof area, helping in precise material calculations for projects.
Q7: What is a square in roofing shingles?
A7: In roofing shingles, a “square” denotes 100 square feet of roof area, essential for calculating shingle bundles needed for a project.
Q8: What is a square in roofing cost?
A8: The cost of a roofing square varies based on the material used, representing 100 square feet and influencing overall project cost estimation.
Q9: How many bundles in a roofing square?
A9: The number of bundles in a roofing square depends on shingle type; for example, asphalt shingles might require about three bundles for one roofing square.
Q10: Roofing square calculator
A10: A roofing square calculator assists in estimating the number of squares needed based on roof dimensions, aiding accurate material estimation.
Q11: How many roofing squares in 1,200 square feet?
A11: 1,200 square feet is equivalent to 12 squares in roofing, assisting in material calculations for projects of that size.
Q12: Roofing square size
A12: The size of a roofing square remains constant at 100 square feet, serving as a standardized unit in the roofing industry.
Q13: Square feet to roofing squares calculator
A13: A “square feet to roofing squares” calculator converts roof area into the number of roofing squares, aiding precise material estimation.
Q14: Roofing square tool
A14: A roofing square tool assists in accurate calculations, aiding contractors and homeowners in project planning.